
对于应用开发者而言,提示工程是影响生成式 AI 模型输出的主要方式。例如,在使用 LLM 时,您可以编写提示,以影响模型回答的语气、格式、长度和其他特征。
您撰写这些提示的方式取决于您使用的模型;为一个模型撰写的提示在应用于其他模型时可能无法有效运行。同样,您设置的模型参数(温度、Top-k 等)也会根据模型的不同而对输出产生不同的影响。
要让模型、模型参数和提示这三个因素协同工作以生成理想输出,往往并非易事,通常需要反复迭代和大量实验。Genkit 提供了一个名为 Dotprompt 的库和文件格式,旨在让这种迭代更快、更方便。
Dotprompt 的设计基于提示即代码这一前提。您可以单独定义提示以及它们所针对的模型和模型参数,而无需使用应用代码。然后,您或其他甚至不参与应用代码编写的人,都可以使用 Genkit 开发者界面对提示和模型参数进行快速迭代。提示按您想要的方式运行后,您可以将其导入应用并使用 Genkit 运行。
您的提示定义各自位于一个扩展名为 .prompt 的文件中。以下是这些文件的示例:
---
model: googleai/gemini-1.5-flash
config:
  temperature: 0.9
input:
  schema:
    location: string
    style?: string
    name?: string
  default:
    location: a restaurant
---

You are the world's most welcoming AI assistant and are currently working at {{location}}.

Greet a guest{{#if name}} named {{name}}{{/if}}{{#if style}} in the style of {{style}}{{/if}}.
三条短划线中的部分是 YAML 前文,类似于 GitHub Markdown 和 Jekyll 使用的前文格式;文件的其余部分是提示,可以选择使用 Handlebars 模板。以下部分将详细介绍构成 .prompt 文件的各个部分以及如何使用它们。
准备工作
在阅读本页面之前,您应该先熟悉使用 AI 模型生成内容页面中介绍的内容。
如果您想运行本页面中的代码示例,请先完成使用入门指南中的步骤。所有示例都假定您已在项目中将 Genkit 作为依赖项进行安装。
创建提示文件
虽然 Dotprompt 提供了多种不同的方式来创建和加载提示,但它经过优化,更适用于将提示组织为单个目录(或其子目录)中 .prompt 文件的项目。本部分介绍了如何使用此推荐设置创建和加载提示。
创建提示目录
Dotprompt 库会在项目根目录中查找提示,并自动加载在其中找到的所有提示。默认情况下,此目录名为 prompts。例如,使用默认目录名称时,您的项目结构可能如下所示:
your-project/
├── prompts/
│   └── hello.prompt
├── main.go
├── go.mod
└── go.sum
如果您想使用其他目录,可以在配置 Genkit 时指定该目录:
g, err := genkit.Init(ctx.Background(), ai.WithPromptDir("./llm_prompts"))
创建提示文件
您可以通过以下两种方式创建 .prompt 文件:使用文本编辑器或使用开发者界面。
使用文本编辑器
如果您想使用文本编辑器创建提示文件,请在提示目录中创建一个扩展名为 .prompt 的文本文件,例如 prompts/hello.prompt。
下面是一个最小提示文件示例:
---
model: vertexai/gemini-1.5-flash
---
You are the world's most welcoming AI assistant. Greet the user and offer your
assistance.
破折号中的部分是 YAML 前言,类似于 GitHub Markdown 和 Jekyll 使用的前言格式;文件的其余部分是提示,可以选择使用 Handlebars 模板。前言部分是可选的,但大多数提示文件至少会包含用于指定模型的元数据。本页的其余部分将介绍如何在此基础上更进一步,并在提示文件中充分利用 Dotprompt 的功能。
使用开发者界面
您还可以使用开发者界面中的模型运行器创建提示文件。首先,您需要使用应用代码来导入 Genkit 库,并将其配置为使用您感兴趣的模型插件。例如:
import (
    "context"

    "github.com/firebase/genkit/go/ai"
    "github.com/firebase/genkit/go/genkit"
    "github.com/firebase/genkit/go/plugins/googlegenai"
)

func main() {
    g, err := genkit.Init(context.Background(), ai.WithPlugins(&googlegenai.GoogleAI{}))
    if err != nil {
        log.Fatal(err)
    }

    // Blocks end of program execution to use the developer UI.
    select {}
}
在同一项目中加载开发者界面:
genkit start -- go run .在模型部分中,从插件提供的模型列表中选择要使用的模型。
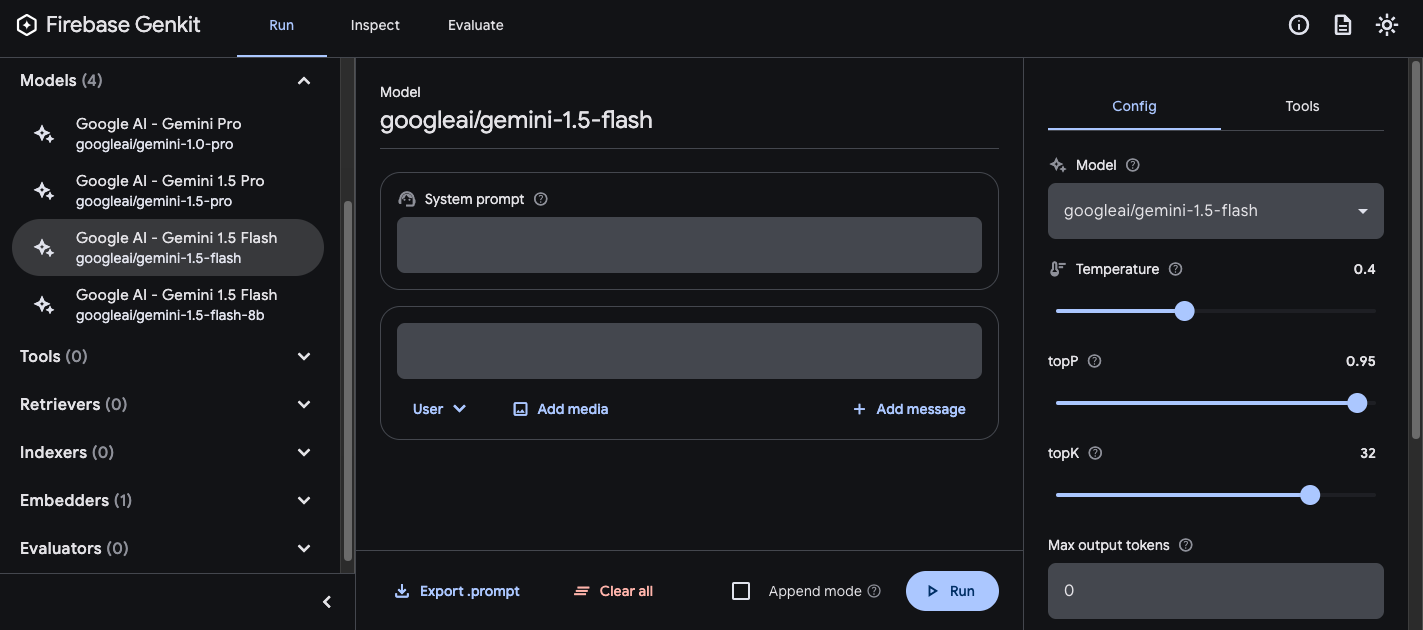
然后,尝试调整提示和配置,直到结果令您满意。准备就绪后,按“导出”按钮,然后将文件保存到提示目录中。
正在运行的提示
创建提示文件后,您可以通过应用代码或使用 Genkit 提供的工具运行这些文件。无论您想如何运行提示,首先要从导入 Genkit 库和您感兴趣的模型插件的应用代码入手。例如:
import (
    "context"

      "github.com/firebase/genkit/go/ai"
    "github.com/firebase/genkit/go/genkit"
    "github.com/firebase/genkit/go/plugins/googlegenai"
)

func main() {
    g, err := genkit.Init(context.Background(), ai.WithPlugins(&googlegenai.GoogleAI{}))
    if err != nil {
        log.Fatal(err)
    }

    // Blocks end of program execution to use the developer UI.
    select {}
}
如果您将提示存储在默认目录以外的目录中,请务必在配置 Genkit 时指定该目录。
通过代码运行提示
如需使用提示,请先使用 genkit.LookupPrompt() 函数加载提示:
helloPrompt := genkit.LookupPrompt(g, "hello")
可执行提示的选项与 genkit.Generate() 的选项类似,其中许多选项在执行时可替换,包括输入(请参阅有关指定输入架构的部分)、配置等:
resp, err := helloPrompt.Execute(context.Background(),
    ai.WithModelName("googleai/gemini-2.0-flash"),
    ai.WithInput(map[string]any{"name": "John"}),
    ai.WithConfig(&googlegenai.GeminiConfig{Temperature: 0.5})
)
您在调用提示时传递的任何参数,都会覆盖提示文件中定义的相同参数。
如需了解可用的选项,请参阅使用 AI 模型生成内容。
使用开发者界面
在优化应用提示时,您可以在 Genkit 开发者界面中运行这些提示,无需依赖应用代码,即可快速迭代提示和模型配置。
从项目目录加载开发者界面:
genkit start -- go run .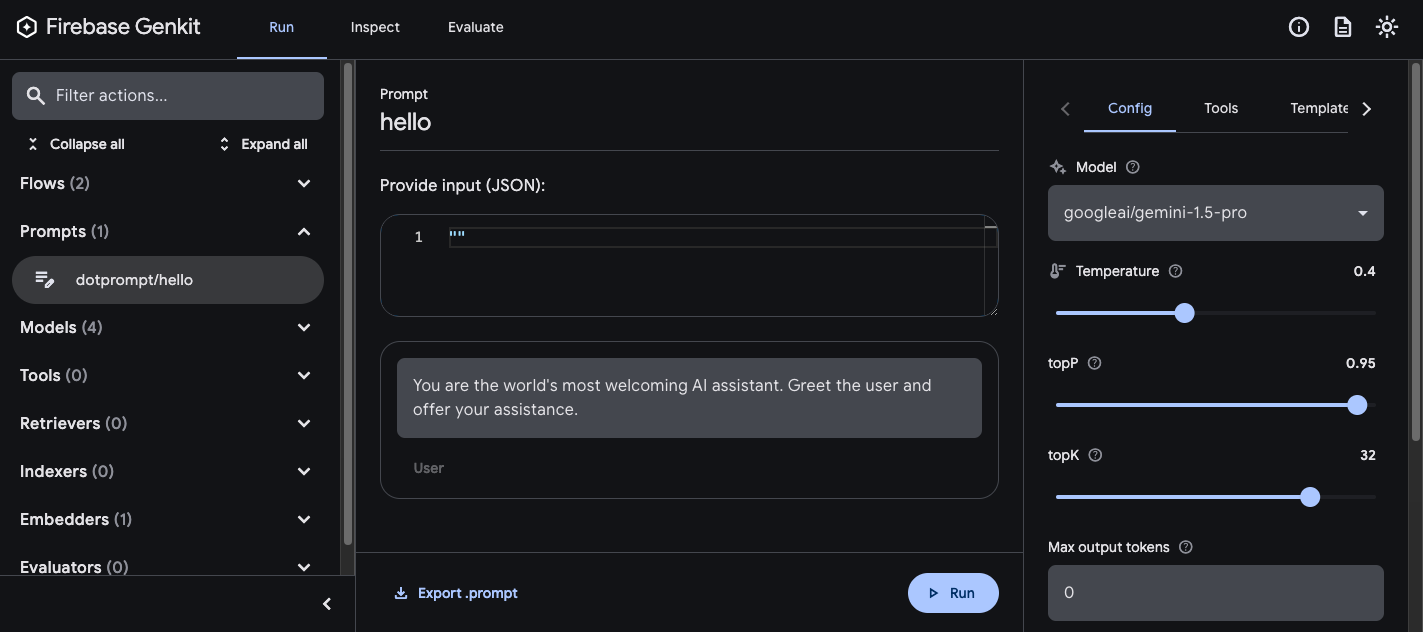
将提示加载到开发者界面后,您可以使用不同的输入值运行提示,并尝试更改提示措辞或配置参数对模型输出的影响。当您对结果满意后,可以点击导出提示按钮,将修改后的提示保存回项目目录中。
模型配置
在提示文件的前言部分,您可以选择为提示指定模型配置值:
---
model: googleai/gemini-2.0-flash
config:
  temperature: 1.4
  topK: 50
  topP: 0.4
  maxOutputTokens: 400
  stopSequences:
    -   "<end>"
    -   "<fin>"
---
这些值直接映射到可执行提示接受的 WithConfig() 选项:
resp, err := helloPrompt.Execute(context.Background(),
    ai.WithConfig(&googlegenai.GeminiConfig{
        Temperature:     1.4,
        TopK:            50,
        TopP:            0.4,
        MaxOutputTokens: 400,
        StopSequences:   []string{"<end>", "<fin>"},
    }))
如需了解可用的选项,请参阅使用 AI 模型生成内容。
输入和输出架构
您可以在前言部分定义提示所需的输入和输出架构。这些架构的使用方式与传递给 genkit.Generate() 请求或 flow 定义的架构非常相似:
---
model: googleai/gemini-2.0-flash
input:
  schema:
    theme?: string
  default:
    theme: "pirate"
output:
  schema:
    dishname: string
    description: string
    calories: integer
    allergens(array): string
---
Invent a menu item for a {{theme}} themed
restaurant.
此代码会生成以下结构化输出:
menuPrompt = genkit.LookupPrompt(g, "menu")
if menuPrompt == nil {
    log.Fatal("no prompt named 'menu' found")
}

resp, err := menuPrompt.Execute(context.Background(),
    ai.WithInput(map[string]any{"theme": "medieval"}),
)
if err != nil {
    log.Fatal(err)
}

var output map[string]any
if err := resp.Output(&output); err != nil {
    log.Fatal(err)
}

log.Println(output["dishname"])
log.Println(output["description"])
您可以通过多种方式在 .prompt 文件中定义架构:使用 Dotprompt 自有的架构格式 Picoschema;标准 JSON 架构;或引用应用代码中定义的架构。以下各部分对这些选项分别进行了更为详细的介绍。
Picoschema
上例中的架构采用的格式称为 Picoschema。Picoschema 是一种基于 YAML 的紧凑型架构定义格式,可简化 LLM 使用时架构的最重要属性的定义。下面是一个较长的架构示例,其中指定了应用可能会存储的与文章相关的信息:
schema:
  title: string # string, number, and boolean types are defined like this
  subtitle?: string # optional fields are marked with a `?`
  draft?: boolean, true when in draft state
  status?(enum, approval status): [PENDING, APPROVED]
  date: string, the date of publication e.g. '2024-04-09' # descriptions follow a comma
  tags(array, relevant tags for article): string # arrays are denoted via parentheses
  authors(array):
    name: string
    email?: string
  metadata?(object): # objects are also denoted via parentheses
    updatedAt?: string, ISO timestamp of last update
    approvedBy?: integer, id of approver
  extra?: any, arbitrary extra data
  (*): string, wildcard field
上述架构等效于以下 Go 类型:
type Article struct {
    Title    string   `json:"title"`
    Subtitle string   `json:"subtitle,omitempty" jsonschema:"required=false"`
    Draft    bool     `json:"draft,omitempty"`  // True when in draft state
    Status   string   `json:"status,omitempty" jsonschema:"enum=PENDING,enum=APPROVED"` // Approval status
    Date     string   `json:"date"`   // The date of publication e.g. '2025-04-07'
    Tags     []string `json:"tags"`   // Relevant tags for article
    Authors  []struct {
      Name  string `json:"name"`
      Email string `json:"email,omitempty"`
    } `json:"authors"`
    Metadata struct {
      UpdatedAt  string `json:"updatedAt,omitempty"`  // ISO timestamp of last update
      ApprovedBy int    `json:"approvedBy,omitempty"` // ID of approver
    } `json:"metadata,omitempty"`
    Extra any `json:"extra"` // Arbitrary extra data
}
Picoschema 标量类型 string、integer、number、boolean 和 any。对象、数组和枚举在字段名称后用英文括号表示。
Picoschema 定义的对象符合严格的模式:所有声明的属性均为必需属性,除非通过 ? 显式标记为可选;对象不允许包含未声明的额外属性。当某个属性被标记为可选时,它也会被设为可为 null,以便 LLM 返回 null 而非省略该字段,从而提供更大的灵活性。
在对象定义中,特殊键 (*) 可用于声明“通配符”字段定义。这将匹配所有未由显式键提供的额外属性。
JSON 架构
Picoschema 不支持完整 JSON 架构的许多功能。如果您需要更强大的架构,可以改为提供 JSON 架构:
output:
  schema:
    type: object
    properties:
      field1:
        type: number
        minimum: 20
提示模板
.prompt 文件中位于前言(如果有)之后的部分是提示本身,该提示将传递给模型。虽然此提示可以是一个简单的文本字符串,但您通常需要将用户输入纳入提示中。为此,您可以使用 Handlebars 模板语言指定提示。提示模板可以包含占位符,这些占位符引用提示输入架构所定义的值。
您在介绍输入和输出架构的部分中已经看到了这种情况:
---
model: googleai/gemini-2.0-flash
input:
  schema:
    theme?: string
  default:
    theme: "pirate"
output:
  schema:
    dishname: string
    description: string
    calories: integer
    allergens(array): string
---
Invent a menu item for a {{theme}} themed restaurant.
在此示例中,当您运行提示时,Handlebars 表达式 {{theme}} 会解析为输入的 theme 属性的值。如需将输入内容传递给提示,请像以下示例中所示那样调用提示:
menuPrompt = genkit.LookupPrompt(g, "menu")

resp, err := menuPrompt.Execute(context.Background(),
    ai.WithInput(map[string]any{"theme": "medieval"}),
)
请注意,由于输入架构将 theme 属性声明为可选并提供了默认值,因此您可以省略该属性,提示将使用默认值进行解析。
Handlebars 模板还支持一些有限的逻辑结构。例如,您可以使用 Handlebars 的 #if 辅助程序定义提示,而非提供默认值:
---
model: googleai/gemini-2.0-flash
input:
  schema:
    theme?: string
---
Invent a menu item for a {{#if theme}}{{theme}}{else}themed{{/else}} restaurant.
在此示例中,如果未指定 theme 属性,提示会渲染为“为餐厅设计菜单项”。
如需了解所有内置逻辑帮助程序,请参阅 Handlebars 文档。
除了输入架构定义的属性之外,模板还可以引用 Genkit 自动定义的值。接下来的几个部分将介绍这些自动定义的值以及如何使用它们。
多消息提示
默认情况下,Dotprompt 会构造包含“user”角色的单条消息。不过,某些提示(例如系统提示)最好以多条消息的组合表示。
{{role}} 辅助函数提供了一种构造多消息提示的简单方法:
---
model: vertexai/gemini-2.0-flash
input:
  schema:
    userQuestion: string
---
{{role "system"}}
You are a helpful AI assistant that really loves to talk about food. Try to work
food items into all of your conversations.

{{role "user"}}
{{userQuestion}}
多模态提示
对于支持多模态输入(例如图片和文本)的模型,您可以使用 {{media}} 辅助函数:
---
model: vertexai/gemini-2.0-flash
input:
  schema:
    photoUrl: string
---
Describe this image in a detailed paragraph:

{{media url=photoUrl}}
网址可以是 https:,也可以是用于“内嵌”图片的 base64 编码 data: URI。在代码中,应如下所示:
multimodalPrompt = genkit.LookupPrompt(g, "multimodal")

resp, err := multimodalPrompt.Execute(context.Background(),
    ai.WithInput(map[string]any{"photoUrl": "https://example.com/photo.jpg"}),
)
如需查看构建 data: 网址的示例,请参阅使用 AI 模型生成内容页面中的多模态输入部分。
局部模板
局部模板是可在任何提示中嵌入的可重用模板。对于具有共同行为的相关提示,局部模板尤其有用。
加载提示目录时,任何以下划线 (_) 开头的文件都被视为局部模板。因此,文件 _personality.prompt 可能包含:
You should speak like a {{#if style}}{{style}}{else}helpful assistant.{{/else}}.
然后,您可以将其添加到其他提示中:
---
model: googleai/gemini-2.0-flash
input:
  schema:
    name: string
    style?: string
---
{{ role "system" }}
{{>personality style=style}}

{{ role "user" }}
Give the user a friendly greeting.

User's Name: {{name}}
使用 {{>NAME_OF_PARTIAL args...}} 语法插入局部模板。如果未向该局部模板提供任何参数,它将在与父提示相同的上下文中执行。
局部模板既支持具名参数,也支持一个用于表示上下文的位置参数。这对于呈现列表成员等任务非常有用。
_destination.prompt
- {{name}} ({{country}})
chooseDestination.prompt
---
model: googleai/gemini-2.0-flash
input:
  schema:
    destinations(array):
      name: string
      country: string
---
Help the user decide between these vacation destinations:

{{#each destinations}}
{{>destination this}}
{{/each}}
在代码中定义局部模板
您还可以使用 genkit.DefinePartial() 在代码中定义局部模板:
genkit.DefinePartial(g, "personality", "Talk like a {{#if style}}{{style}}{{else}}helpful assistant{{/if}}.")
代码中定义的局部模板可用于所有提示中。
定义自定义帮助程序
您可以定义自定义辅助程序来处理和管理提示中的数据。辅助程序使用 genkit.DefineHelper() 全局注册:
genkit.DefineHelper(g, "shout", func(input string) string {
    return strings.ToUpper(input)
})
定义辅助对象后,您可以在任何提示中使用它:
---
model: googleai/gemini-2.0-flash
input:
  schema:
    name: string
---

HELLO, {{shout name}}!!!
提示变体
由于提示文件只是文本,因此您可以(并且应该)将提示文件提交到版本控制系统,以便简化一段时间内的更改比较流程。通常,调整后的提示版本只能在生产环境中与现有版本并行地进行全面测试。Dotprompt 通过其变体功能支持此功能。
如需创建变体,请创建 [name].[variant].prompt 文件。例如,如果您在提示中使用了 Gemini 2.0 Flash,但想了解 Gemini 2.5 Pro 的表现是否更好,则可以创建两个文件:
myPrompt.prompt:“基准”提示myPrompt.gemini25pro.prompt:名为gemini25pro的变体
如需使用提示变体,请在加载时指定相应变体选项:
myPrompt := genkit.LookupPrompt(g, "myPrompt.gemini25Pro")
变体的名称包含在生成跟踪记录的元数据中,因此您可以在 Genkit 跟踪记录检查器中比较和对比变体之间的实际效果。
在代码中定义提示
到目前为止,我们讨论的所有示例都假定您的提示是在单个目录(或其子目录)中的各个 .prompt 文件中定义的,并且在运行时可供您的应用访问。Dotprompt 是围绕这种设置而设计的,其作者认为它是总体上最佳的开发者体验。
不过,如果某些用例在此设置下支持不佳,您也可以使用 genkit.DefinePrompt() 函数在代码中定义提示:
type GeoQuery struct {
    CountryCount int `json:"countryCount"`
}

type CountryList struct {
    Countries []string `json:"countries"`
}

geographyPrompt, err := genkit.DefinePrompt(
    g, "GeographyPrompt",
    ai.WithSystem("You are a geography teacher. Respond only when the user asks about geography."),
    ai.WithPrompt("Give me the {{countryCount}} biggest countries in the world by inhabitants."),
    ai.WithConfig(&googlegenai.GeminiConfig{Temperature: 0.5}),
    ai.WithInputType(GeoQuery{CountryCount: 10}) // Defaults to 10.
    ai.WithOutputType(CountryList{}),
)
if err != nil {
    log.Fatal(err)
}

resp, err := geographyPrompt.Execute(context.Background(), ai.WithInput(GeoQuery{CountryCount: 15}))
if err != nil {
    log.Fatal(err)
}

var list CountryList
if err := resp.Output(&list); err != nil {
    log.Fatal(err)
}

log.Println("Countries: %s", list.Countries)
提示还可以渲染为 GenerateActionOptions,然后进行处理并传递到 genkit.GenerateWithRequest():
actionOpts, err := geographyPrompt.Render(ctx, ai.WithInput(GeoQuery{CountryCount: 15}))
if err != nil {
    log.Fatal(err)
}

// Do something with the value...
actionOpts.Config = &googlegenai.GeminiConfig{Temperature: 0.8}

resp, err := genkit.GenerateWithRequest(ctx, g, actionOpts, nil, nil) // No middleware or streaming
请注意,所有提示选项都会传递到 GenerateActionOptions,但 WithMiddleware() 除外,如果使用 Prompt.Render()(而非 Prompt.Execute()),则必须单独传递。